On this page
Trackside Tyres — the calculator at the circuit
Getting tyre pressures right is one of the quickest ways to find lap time, and at the track you do it on a phone, in a hurry, often with cold hands. The trackside Tyre Pressure Calculator runs the same calculation as the one on your computer, arranged for one thumb — and it starts working before you have touched anything.
This chapter covers trackside — the phone-first Apex app you use at the circuit. For what each input means, see Tyres — the pressure calculator; this chapter covers using it on a phone.
Throughout this chapter we follow Jordan Miles, our demo driver — an EKS Eagle at Go Kart Club of Victoria.
What this is for
Use the trackside calculator to:
- Get a cold starting pressure for each corner of the kart, between sessions, without opening a laptop.
- Adjust for track temperature, grip, weather and the session you are about to run.
- Work backwards from a hot pressure you already know you want.
All pressures on this screen are in PSI. There is no unit switch.
How to get here
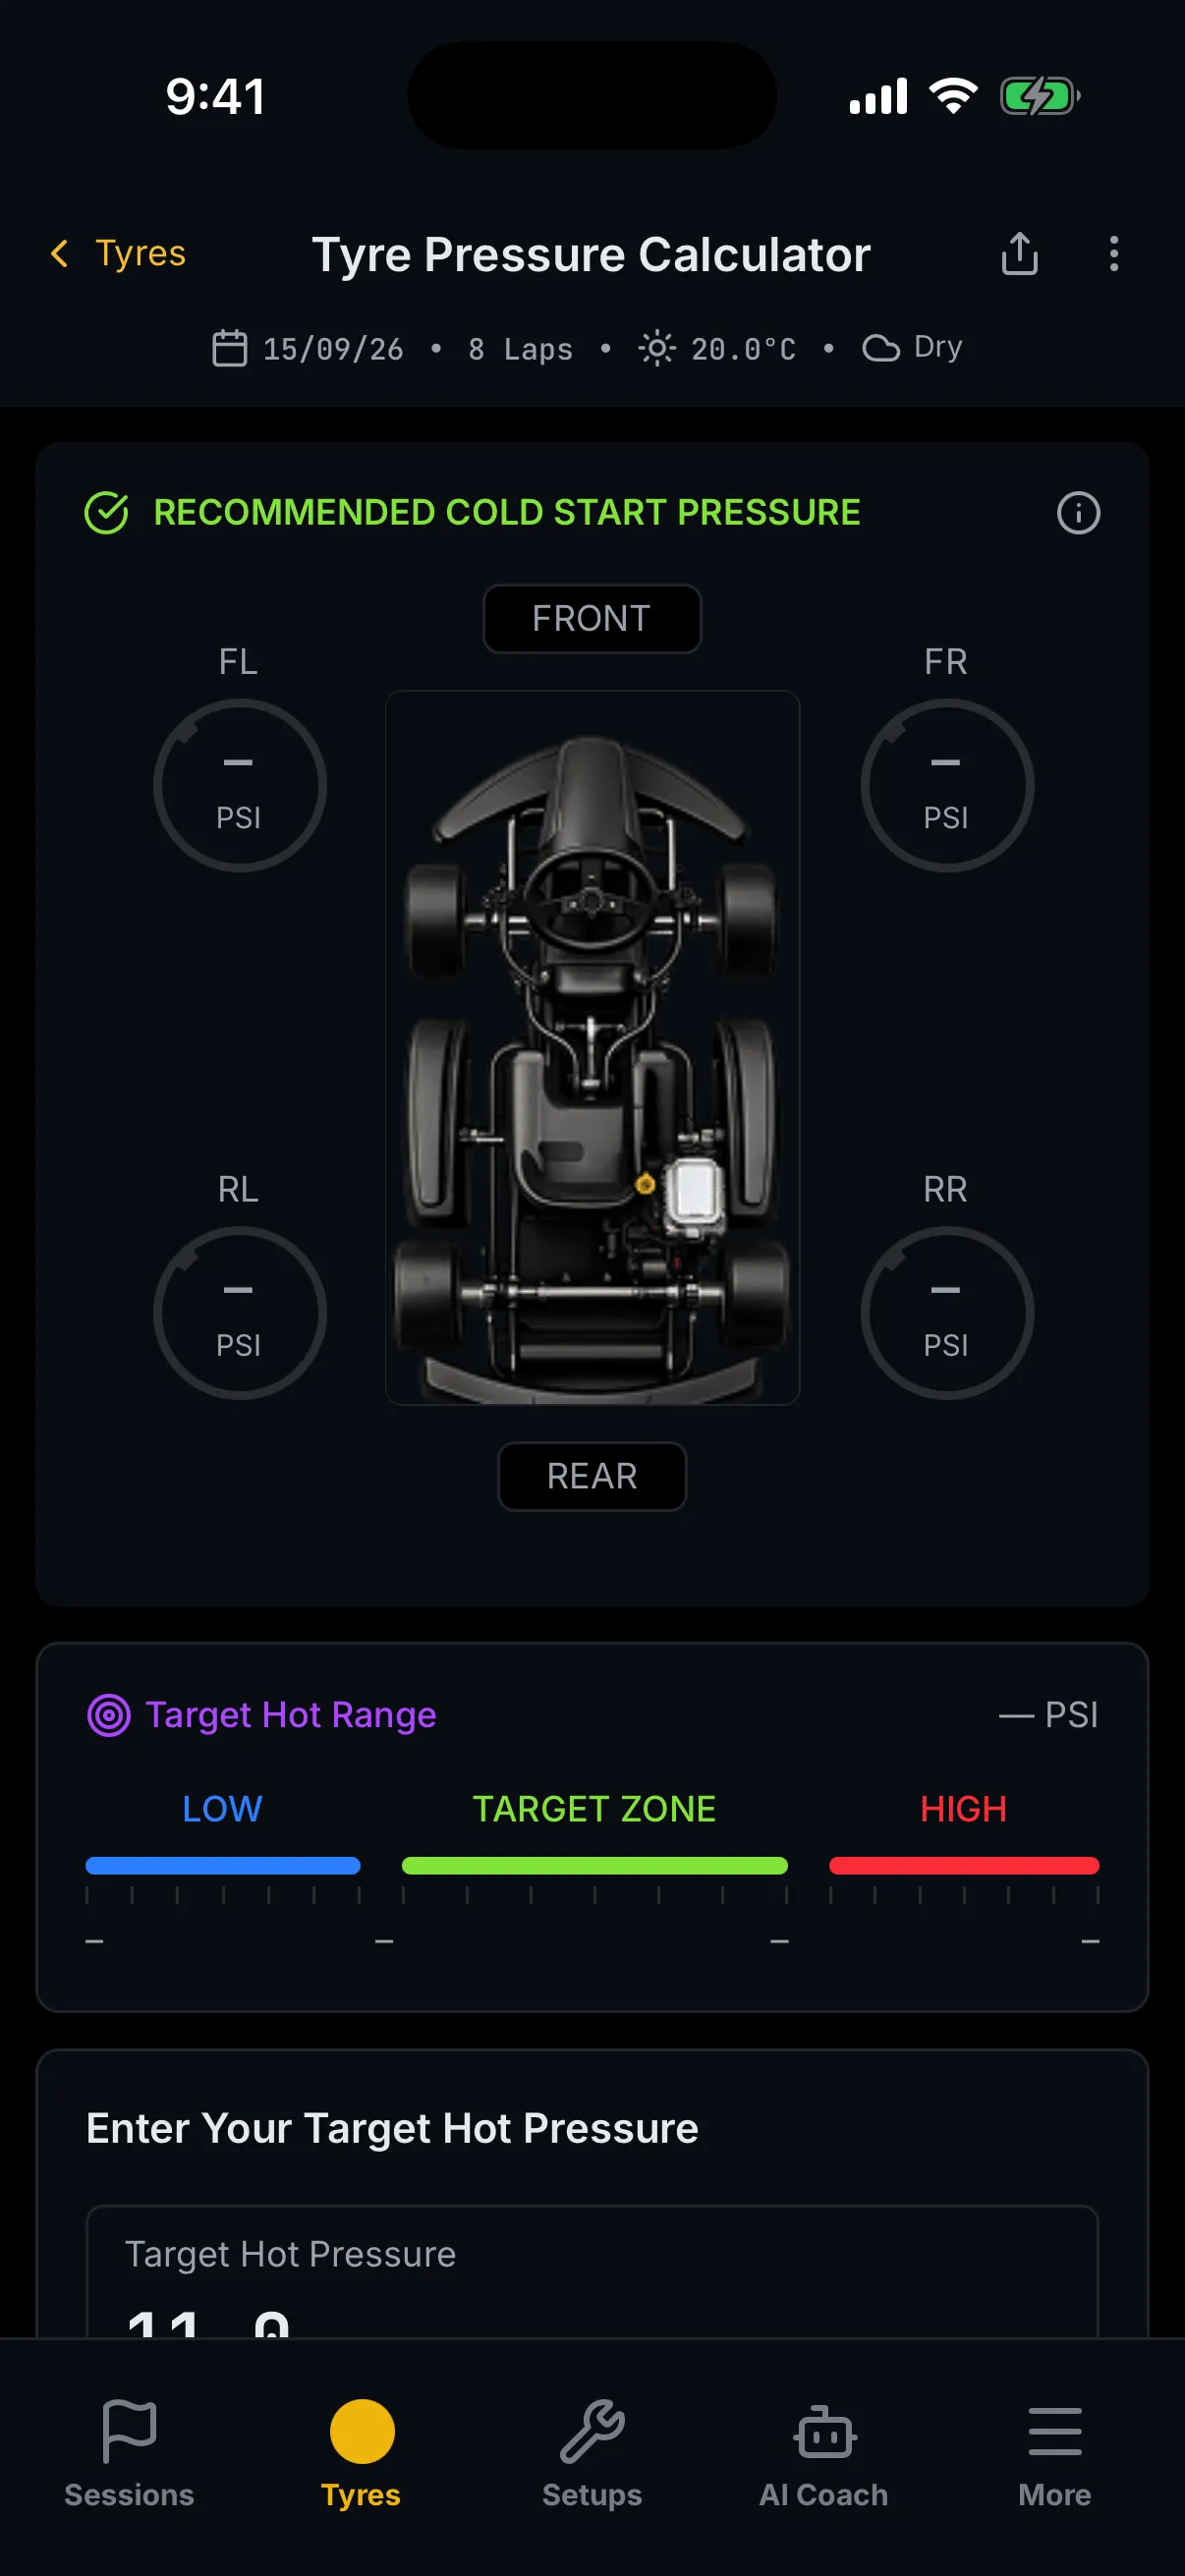
Tap Tyres in the bottom tab bar. The header reads Tyre Pressure Calculator, with a summary strip beneath it — the date, the lap count, the track temperature and the weather.
It calculates the moment you arrive
This is the most surprising thing about the screen, and it is deliberate. If your saved defaults already supply the two fields the calculation needs — the tyre manufacturer and the tyre make — the calculator fires on entry, exactly as though you had pressed Calculate. So the first thing you see is often a result rather than an empty form.
It fires once, on the way in, and only when the defaults can complete the form on their own. If you have to pick a manufacturer yourself, nothing runs until you press the button — a form you must finish by hand never auto-fires. If you reach the button before the defaults settle, your press wins.
The screen above is what you see when the defaults could not complete the form: the rings read a dash and the Target Hot Range has no band yet.
Every element
The input cards
The inputs are grouped into collapsed cards rather than the long form used on a computer. Each card shows its current values on its own header, so you can check the lot at a glance and open only the one you need to change.
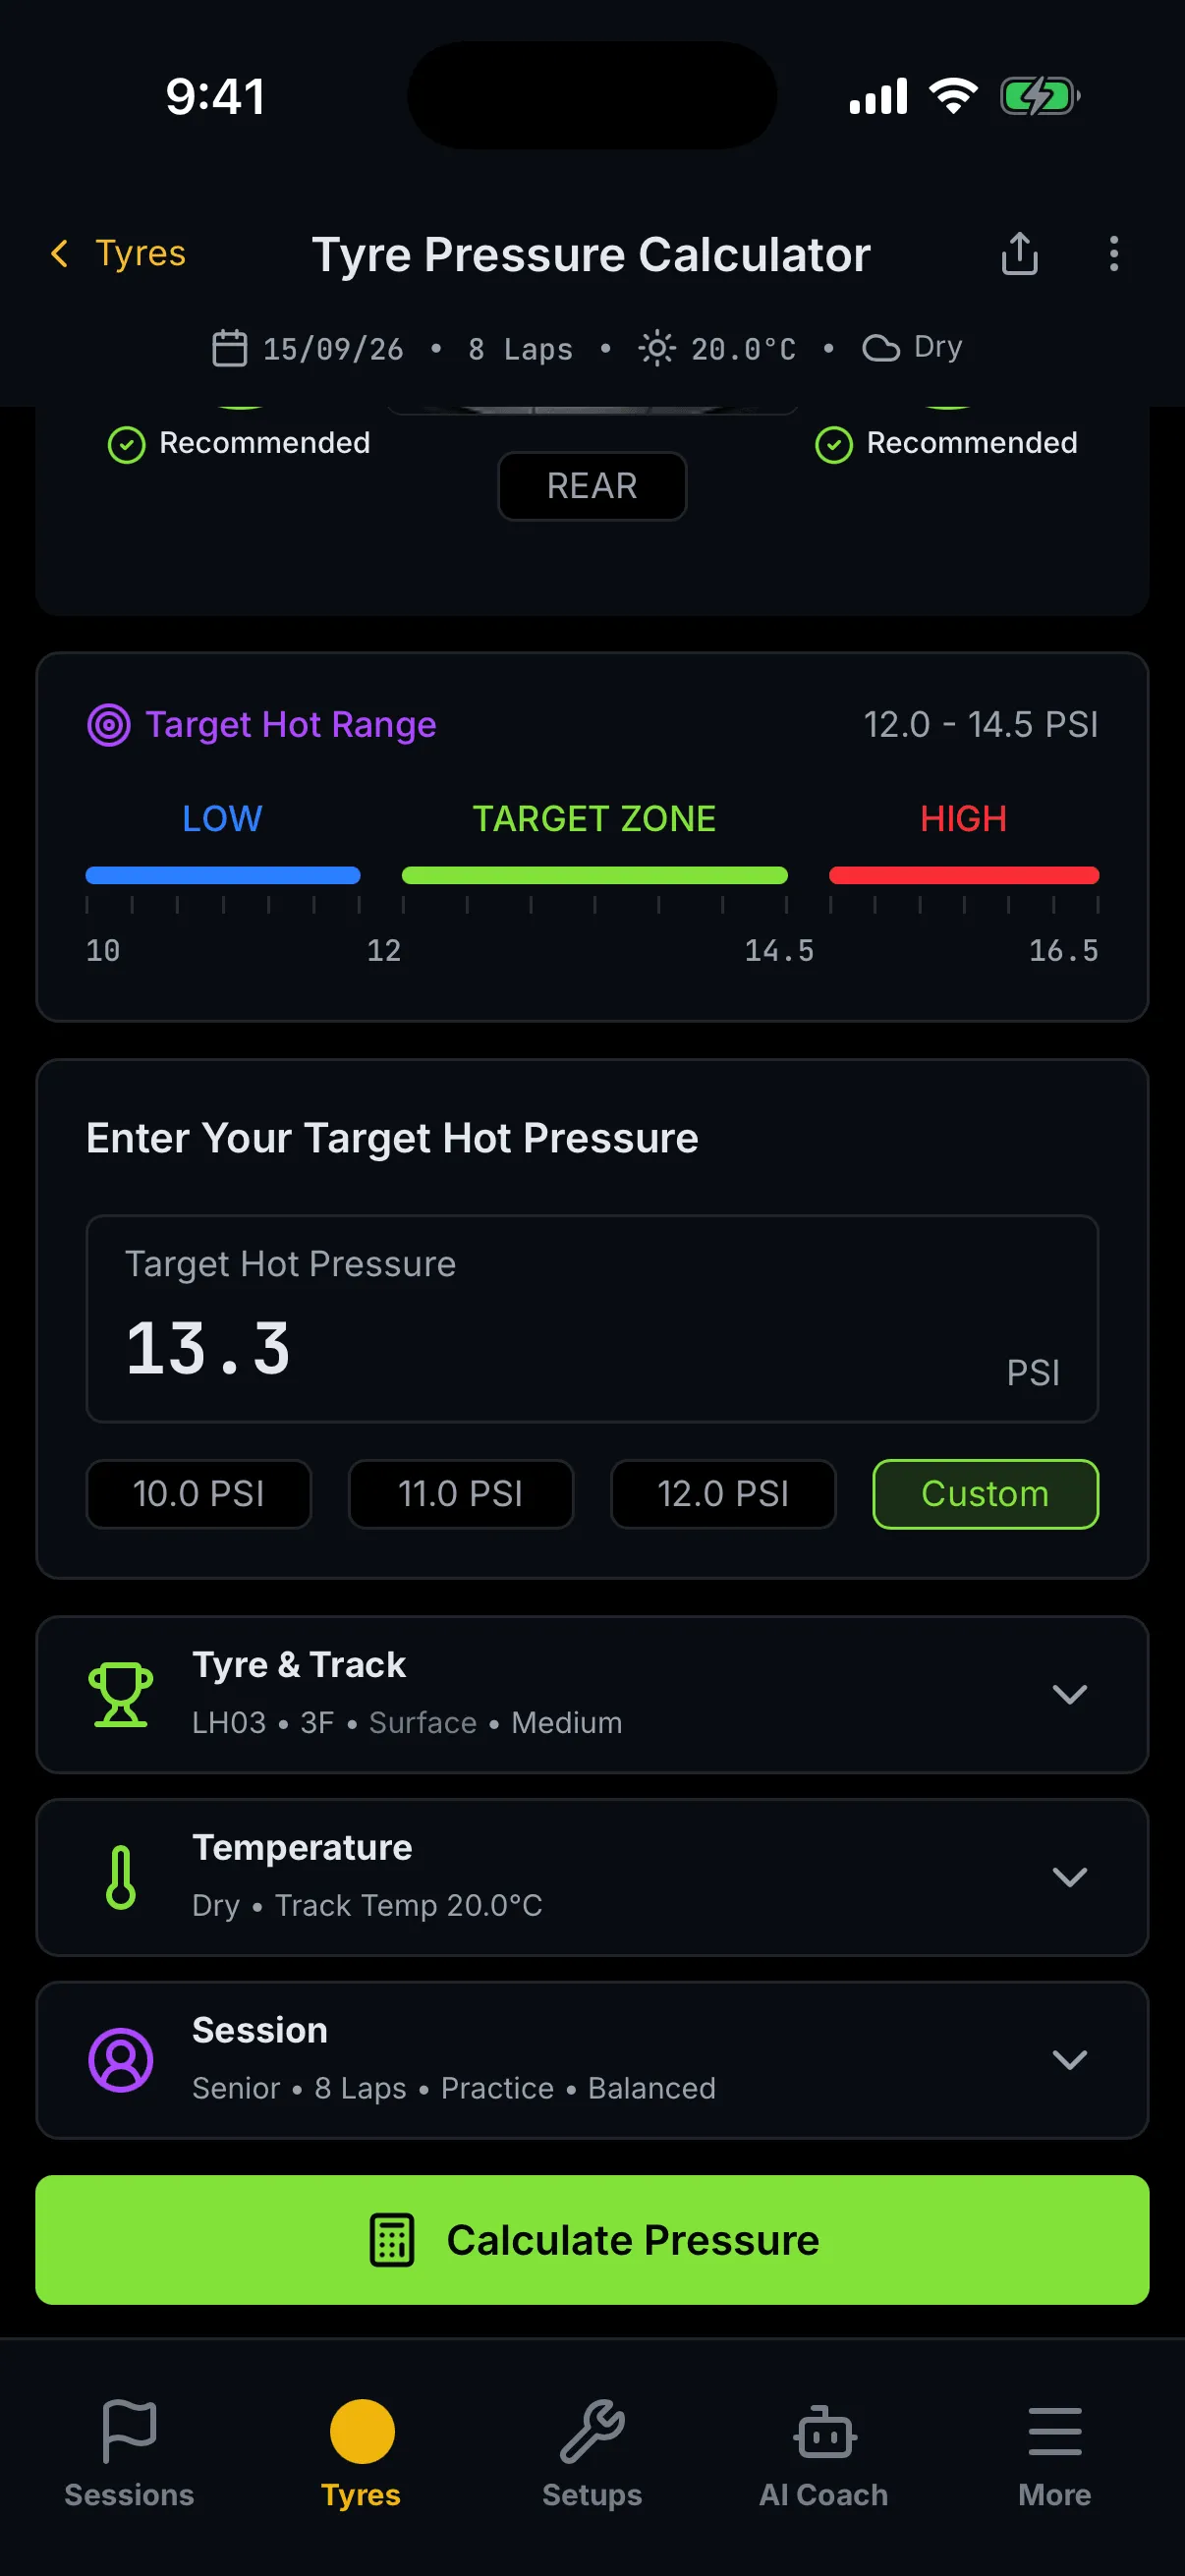
The fields are the same ones chapter 01 documents in full. Two behave differently here:
- Direction is always set. It starts at clockwise and there is no blank option, which is why the corner rings always carry wheel names rather than load names — see below.
- Grip, weather and session type each carry a default, so a driver who changes nothing still gets a usable answer.
The recommended cold-start pressure
The result card is headed RECOMMENDED COLD START PRESSURE. Four corner rings flank a top-view drawing of the kart, with FRONT and REAR pills marking the ends.
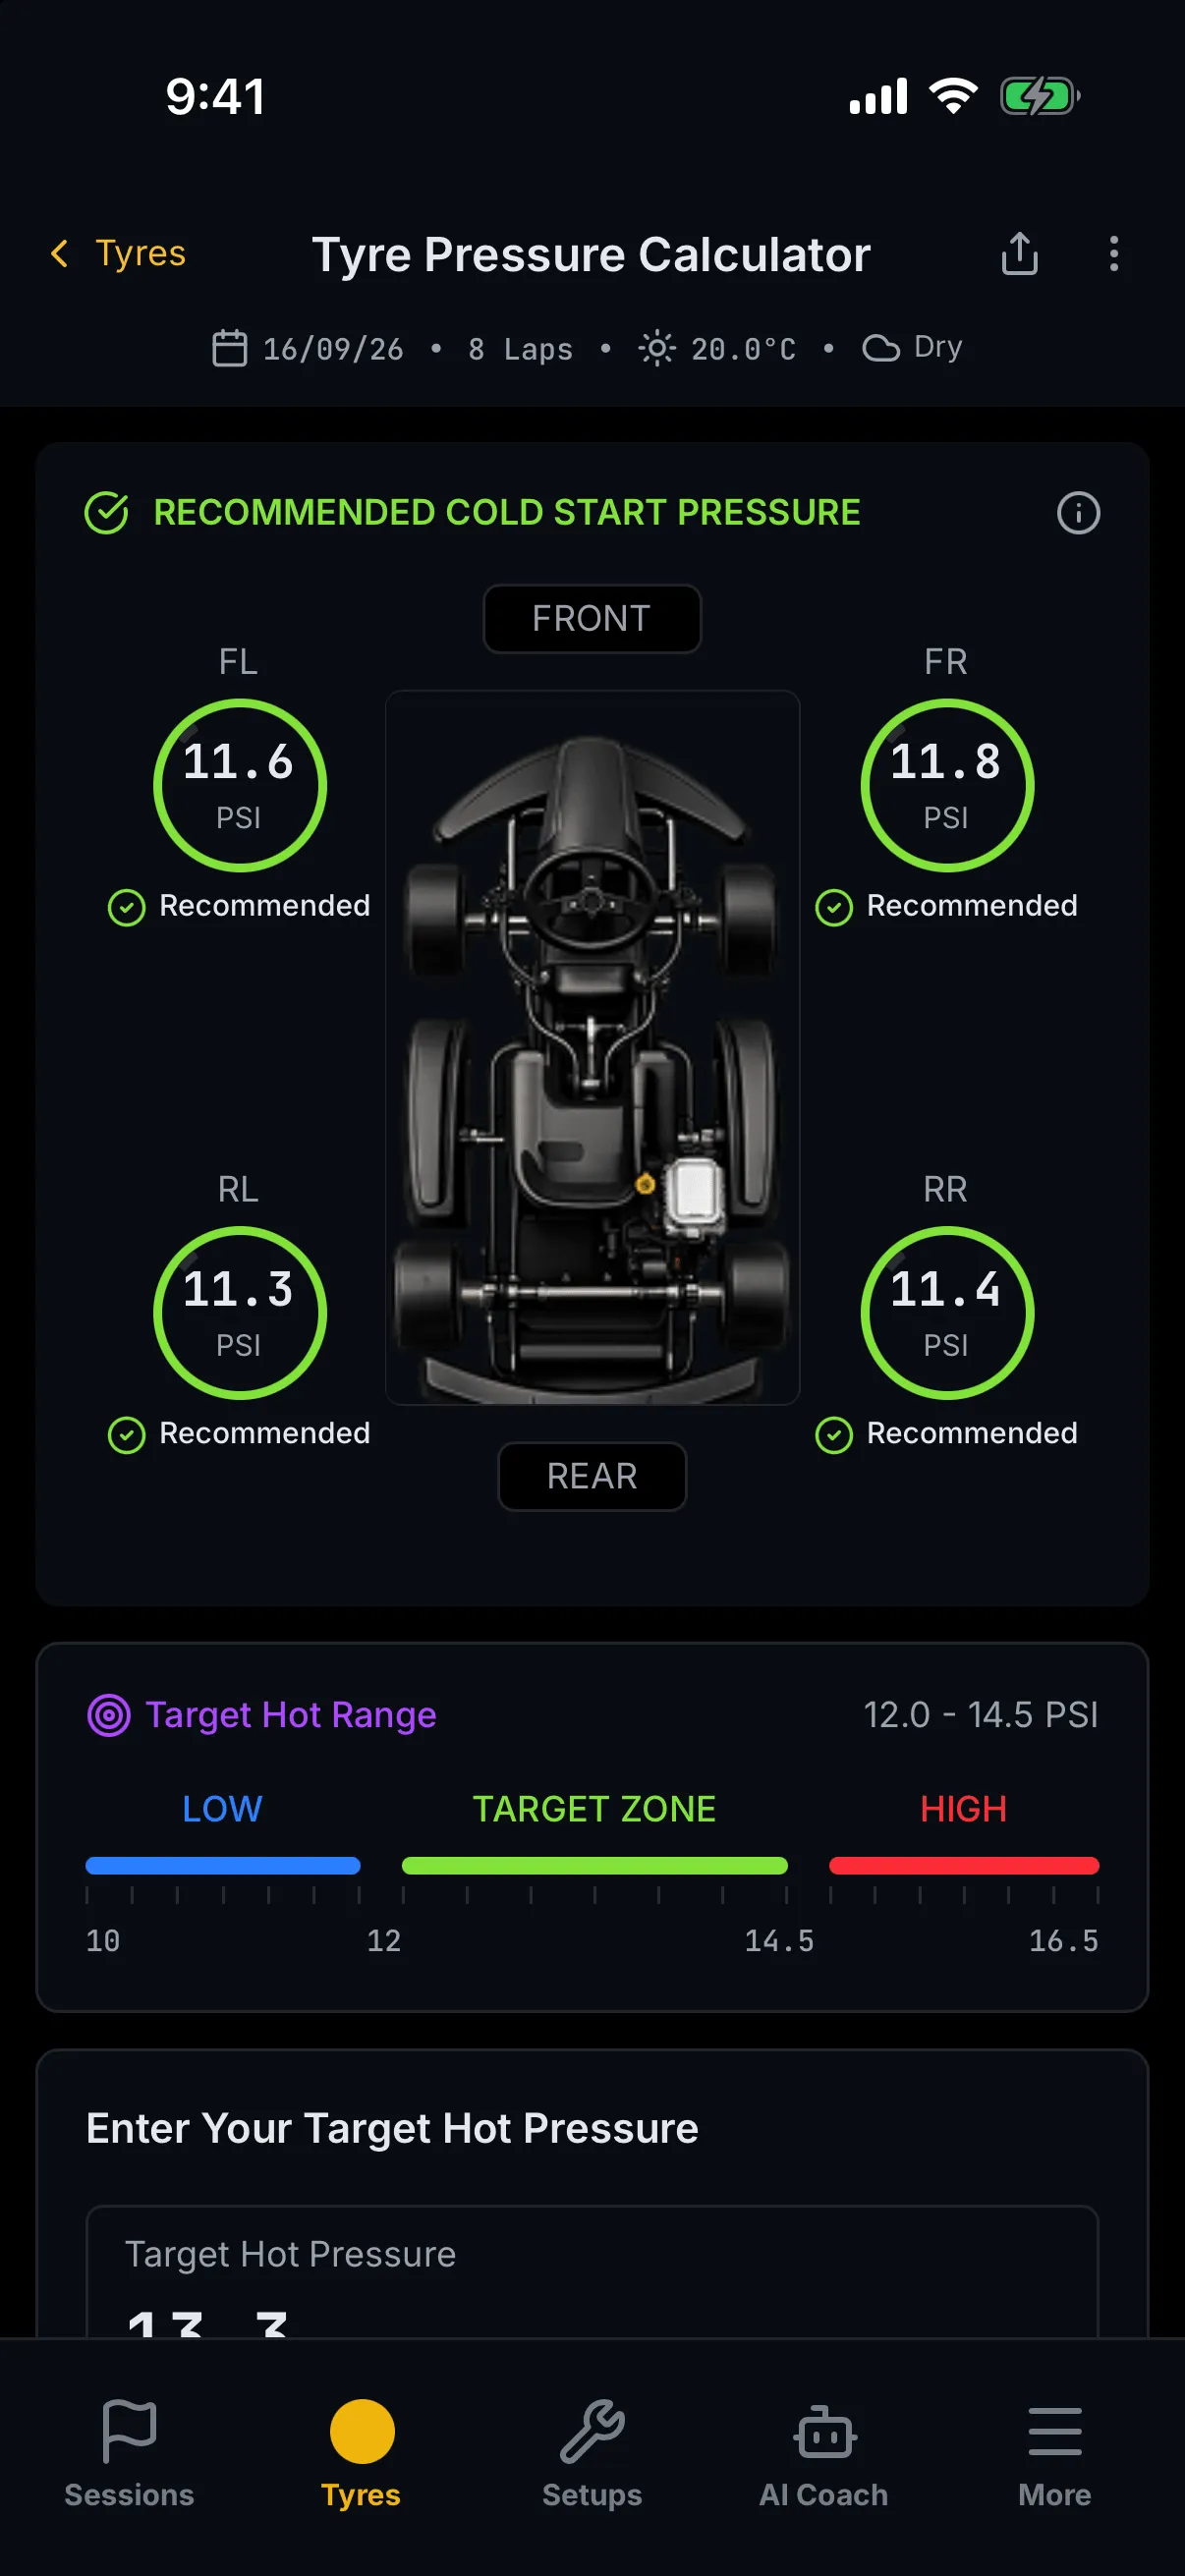
Each ring shows one corner's cold starting pressure in PSI, with a status line beneath it.
Why the rings say FL, FR, RL and RR
The calculation works in load terms — outside front, inside front, outside rear, inside rear — because that is what actually determines a pressure. The screen shows wheel terms, because that is what you can reach with a gauge.
The mapping follows the track's direction. On a clockwise circuit the turns are predominantly right-handers, so the left side of the kart carries the outside load: the outside-front pressure is shown on FL. An anti-clockwise circuit mirrors it.
Direction always has a value, so these labels are always wheel names. (The Outside and Inside labels you may have seen elsewhere in trackside belong to the setup editor's pressure gauges, not to this screen.)
Target Hot Range
Beneath the rings, a three-zone bar — LOW, TARGET ZONE, HIGH — shows the hot pressure the recommendation is aiming at, with the band's low and high figures in PSI. Before a calculation it reads an em dash.
Setting your own hot target
If you already know the hot pressure you want, you can give the calculator that number and let it work backwards to the cold pressure that gets you there. The Target Hot Pressure card takes a figure directly, with preset chips beside it and Custom for anything else.
When a calculation has been run this way, two things change on the result card:
- each ring is marked Cold Start instead of Recommended;
- a line appears beneath the rings reading "Anchored to your N PSI hot target", with how far that sits from the book figure.
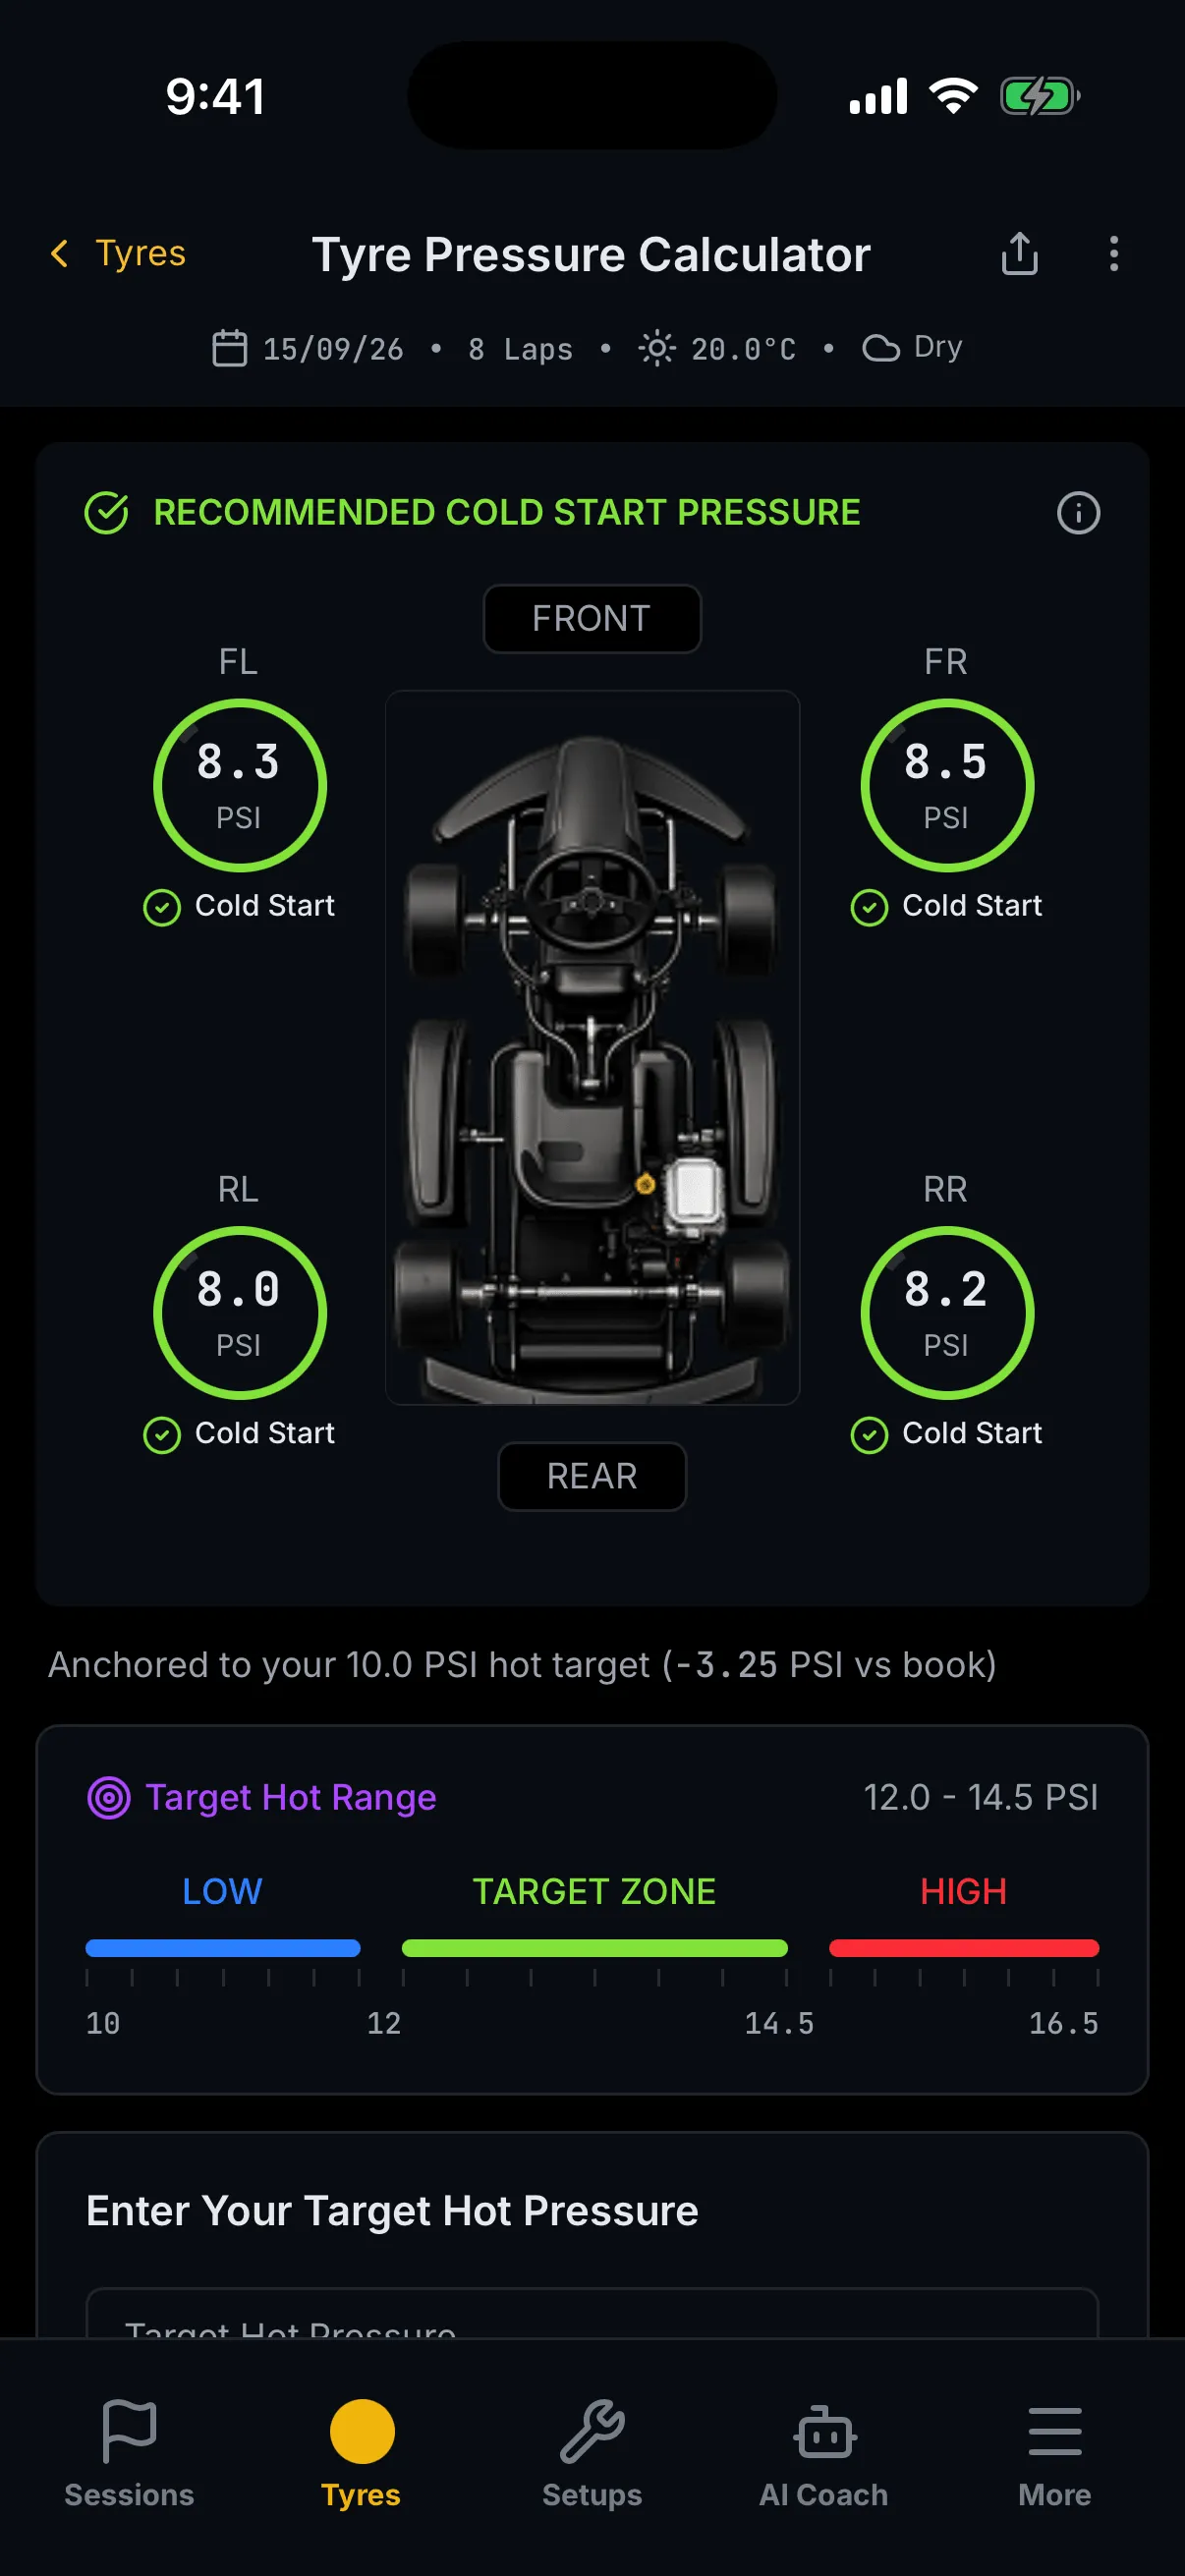
These are two states of one card, not two cards. The heading reads RECOMMENDED COLD START PRESSURE either way; what tells you which calculation you are looking at is the label under the rings and the anchored line. The two pictures above are different calculations, so do not expect their numbers to relate.
If you do not have the Tyre Calculator
The screen is gated. Without the entitlement you get the header and, in place of the calculator, an upgrade card reading "Tyre Calculator requires an upgrade" — "The tyre-pressure calculator needs the Tyre Calculator or Premium plan. Upgrade your subscription to calculate target pressures for your kart."
It is a different screen from the banner the desktop pages show. Nothing is calculated behind it.
Walkthrough: pressures between sessions
- Tap Tyres in the bottom tab bar. What you'll see: either a finished result, or empty rings if your defaults could not complete the form.
- Open Tyre & Track and confirm the tyre, the wheel, the surface and the direction. What you'll see: the card header updates to summarise your choices as you close it.
- Open Temperature and set the track temperature and the weather.
- Open Session and set the class, the session type and the lap count.
- Press Calculate Pressure. What you'll see: the four rings fill in, each marked Recommended, and the Target Hot Range draws its band.
- Optional. Enter a Target Hot Pressure and calculate again. What you'll see: the rings change to Cold Start and the anchored line appears.
Where to next
- Tyres — the pressure calculator — what every input means, saved tyre setups, and the 6-step adjustment.
- Work out your tyre pressures
- Understand your tyre pressure results
- Unfamiliar word? See the Glossary. Stuck? See Troubleshooting & FAQ.